Find the right hydrometer for your profession (or passion)

Find the right hydrometer for your profession (or passion)
If you’re…
- Making wine
- Brewing beer
- Refining crude oil
- Checking the purity of cow’s milk
- Measuring the concentration of salt in meat packing or pickling
- Testing the quality of antifreeze
- Or perfecting your family maple syrup recipe
...then you need a good hydrometer. One designed for the task at hand.
A hydrometer is an essential tool in your toolbelt. You can’t do good work without one. Let’s explore:
- how a hydrometer works
- who can benefit from one
- and what the best fit for your profession (or hobby) might be
First thing’s first.
What is a hydrometer?
A hydrometer is an essential measuring device, used to measure and detect the specific gravity of an object.
Specific gravity (or relative density) is the ratio of the density of an object compared to the density of a reference liquid (like water).

How does a hydrometer work?
The principle behind your hydrometer is that the buoyancy of the liquid increases with the weight of the liquid. Basically, the heavier the liquid sample you’re testing (wine, milk, salt water, etc.), the higher the hydrometer will float.
For example, if you place your hydrometer in water, it will float much lower than if you put the same hydrometer in maple syrup. The reason? Maple syrup weighs much more than water.
Find your right hydrometer right here
Okay, but why do we care how high or low the hydrometer floats?
Let’s look at an example. Imagine, you’re making a nice red wine. During the fermentation process, thick (heavy) sugars ferment and are turned into thin (lighter) alcohol. Your liquid sample is going from heavy to light, which means that throughout the fermentation process, your wine hydrometer will float at different heights -- and give you different measurements.
At the start of the process, the hydrometer will float at its highest. But as the fermentation process continues, the hydrometer will float lower as your sample gets lighter. By keeping an eye on the hydrometer’s measurements throughout the process, you can monitor the fermentation progress and keep track of the alcohol produced.
The basics: How to use a hydrometer
A great thing about using a hydrometer is that it’s simple and straightforward. Just follow these steps:
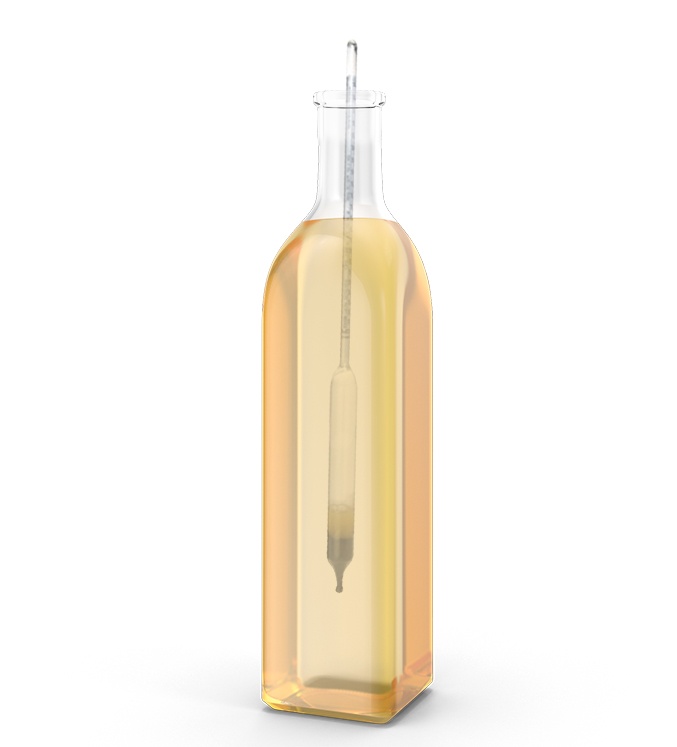
- Place a sample of the liquid to be tested into a hydrometer jar (or test jar). Always make sure that the temperature is within the recommended range as per your specific hydrometer. And make sure you’ve added enough sample that your hydrometer isn’t touching the bottom of the jar.
- Place your hydrometer into the sample and allow it to settle. Pro tip - do this part over the sink so that it doesn’t overflow. Make sure the hydrometer isn’t touching the sides or bottom of the jar, as this will throw off your reading.
- Check for air bubbles. Spin the hydrometer to remove any bubbles that may have formed along the side of your hydrometer.
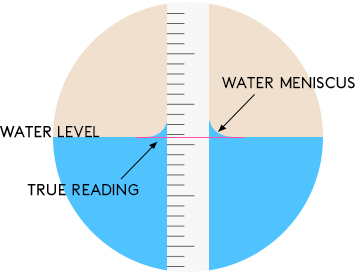
- Once the hydrometer stops spinning, take your first reading from the Specific Gravity or Brix scale, where the liquid intersects the scale. Remember the meniscus: the liquid will raise up a little bit where it touches the wall of the sample jar (this curve is called the meniscus). Don’t take your reading from the lifted edge. Instead, take it at the lowest level of the liquid surface (the bottom of the meniscus) for an accurate read.
- Give yourself (or your closest colleague) a high five, because you did it!

Are there different types of hydrometers? And who uses them?
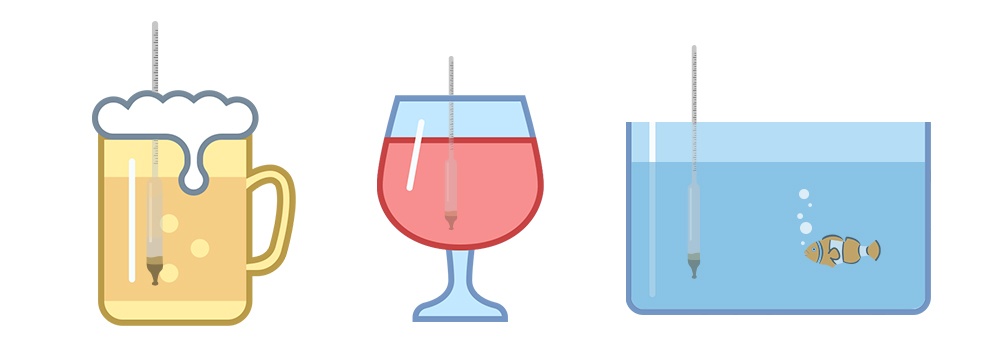
Hydrometers are used for all sorts of applications, by professionals and by passionate hobbyists perfecting their craft brew or managing their salt water fish tanks at home.
Common types of hydrometers include:
- Alcoholometers: Commonly used to assess alcoholic strength before and after fermentation. Their range varies between 0.98 and 1.12° specific gravity (SG). For the best option, click here.
- Aquarium hydrometers: Commonly used to assess the salinity of aquariums and terrariums.
- Lactometers: Used to assess milk quality. Their range varies between 1.025 to 1.035 g/ml.
- Saccharometers: Measure the amount of sugar in a substance, and are widely used in breweries. Low levels of sugar make a solution less dense, and cause the hydrometer to float higher.
- Urinometers: Essential for urinalysis, these tools measure a patient’s hydration levels, and have a range from 1 to 1.06 °SG.
- Thermohydrometers: Combine a hydrometer and a thermometer, and are ideal for assessing the density of petroleum products (which requires the sample to be heated prior to analysis).
- Antifreeze testers: Used to measure the ratio of antifreeze to water.
- Soil hydrometers: Popular instruments for soil analysis, used when the grains are too small for sieve analysis. They can have a range of 0.995 to 1.038 °SG.
How to choose the right hydrometer for me?
It all depends on what you’re measuring, how you’re using it, and what your budget is. We’ll share some recommendations for common applications below, but when choosing your hydrometer, keep in mind:
- What you’re measuring: For example, triple-scale hydrometers are more affordable and multi-purpose, but have a more limited range. Brix Scale hydrometers are great for measuring wine content, and Specific Gravity are great for your beer brew. Thermohydrometers measure both specific gravity and temperature.
- How and where you’re using your hydrometer: Glass hydrometers break more easily. Paper scales might be less accurate. And hydrometers equipped with mercury require special safety considerations (and are harder to dispose of). Think about how you’ll be using your hydrometer to determine the right fit.
- Your budget: If you’re not refining crude oil, you may not need a precision, digital thermohydrometer. Keep in mind that you might require additional accessories as well (e.g. testing jars, graduated cylinders).
The best hydrometers for everyone
Kimble hydrometers give pro users and hobbyists alike exceptional value. These hydrometers are so popular across industries because of their accuracy and versatility. What’s so great about Kimble hydrometers? They’re…
- Safe, strong and eco-friendly: To produce a more environmentally-friendly instrument, the ballast is made from steel pellets and a binder and is free of heavier, toxic metals
- Exceeds ASTM E100 specifications
- Calibrated to ASTM E126 specifications for accuracy
- Reliable: Comes with a certificate of traceability showing devices calibrated using NIST traceable standards
Not sure where to start? Here are the best sellers to help guide you in the right direction…
The best hydrometer for making wine, beer and cider: Specific Gravity hydrometer
Best for:
- Wine, beer and cider brewers
- Super good value for home users and pros alike
The best hydrometer for heavier liquids: The Baume Hydrometer
Best for:
-
Measuring liquids heavier than water
(In ranges from 0° to 71°) - Commonly found in the chemistry, pharmacology, food and beverage and starch industries
The best Plain Form hydrometer
Best for:
- Petrochemical, environmental and pharmaceutical use, and in the food and beverage industry
- American Petroleum Institute scale is used to measure gravity of liquid sample compared to water
The best hydrometer when you’re getting specific: The Salt Brine Ethanol hydrometer
Best for:
- Versatility of measuring salt content in aqueous solutions like fish tanks, meat packing or pickling products
- Available in a 0-100% or 0-26.5% saturated sodium chloride scale range
Hydrometers & alcoholic beverages: For the pro or the passionate hobbyist
A precision hydrometer is essential for making the irresistible medium-bodied chardonnay, or perfecting your next craft brew. When producing alcoholic beverages, hydrometers are the go-to instrument used to measure the progress of fermentation, and determine the alcohol percentage in your sample.
We already covered that hydrometers are designed to measure the density of a liquid sample in relation to water. In beer or wine-making, hydrometers are actually measuring how much sugar is in your solution. The more sugar, the heavier the liquid, which means the higher your hydrometer will float.
As the fermentation process progresses, sugar is turned to alcohol, and the hydrometer slowly begins to sink lower in the solution. When fermentation is complete, the hydrometer will stop sinking. Another indication that fermentation has stopped? The lack of bubbles in your airlock.
Best practice is to take two readings, 1 to 2 days apart. If the reading drops between the two, you still have an active fermentation taking place.
A note on hydrometer scales in alcoholic fermentation
The most common scales you’ll find with your hydrometer include:
- A Specific Gravity scale, most commonly used in brewery
- A Brix Scale, most commonly used in winemaking
- A Potential Alcohol Scale, which is a rough estimate of potential alcohol that can be used in beer or wine making
Cheers to the beer hydrometer
Your beer hydrometer is an important part of crafting the perfect brew, by measuring the original gravity of your wort, and the final gravity of your beer. This helps you determine the ABV (Alcohol by Volume), which is the standard measurement of the amount of alcohol (ethanol) contained in a specific beer.
Most beer brewers rely on a trusty Specific Gravity Scale for the process.
Homebrewers use hydrometers to measure the amount of sugar content in their wort. By measuring at the beginning and end of your fermentation process, you can calculate the amount of alcohol in the finished beer and estimate how well your yeast has performed.
Pro tip: The most accurate way to measure alcohol percentage by volume in beer is to make an Original Gravity reading and Final Gravity reading.
Once you have your numbers, plug them into this formula:
(Original Gravity Reading”) - (Final Gravity Reading”) x (131) = % Alcohol Content by volume.
For example, if 1.073 was your Original Gravity reading, and 1.012 is the Final Gravity reading, your calculation would look a little something like this: 1.073-1.012=.06 x 131 = 7.99% ABV
Find the best hydrometer for home or professional brewing here
A toast to the wine hydrometer
Winemakers need to keep some unique things in mind. The Brix Scale is the go-to for most pros and hobbyists. For example, your final reading is often below zero because, in wine, nearly all the sugar in your sample is converted to alcohol. And because wine is lighter than water, your reading at the end of the fermentation process can be a negative number.
Pro tip: When your measurement is below zero, you have to add it back to your original reading. For example, if your original reading is 12.5 potential alcohol, and your final reading is -.7 potential alcohol, your formula is going to look something like this:
(12.5+.7)=13.2 % ABV
Find the best hydrometer for home or professional brewing here
Hydrometer scales
The most commonly used scales include:
- Specific gravity: Most commonly used among home winemakers. The Specific Gravity scale is based on the weight of water. Floating a hydrometer in water will read 1.000 on the scale. At the start of the fermentation process, the reading might look something like 1.090 - meaning the juice (at this point) weighs 9% more than water, or is 9% thicker than water. When all the sugar is turned to alcohol, the reading will be less than water (or below zero), usually around the 0.995 point, which indicates that your sample weighs less than water. The scale helps you follow the fermentation process, and stay on track with your home wine making.
- Brix scale: Commonly used by grape growers and commercial wineries, and by more advanced wine makers. The Brix scale is based on the percentage of sugar in the liquid sample, by weight. The scale usually goes from 0-30 on most wine making hydrometers, and if you have grape juice with a reading of 24 on your Brix scale, it tells you that your sample is made up of 24% sugar by weight. Vineyards also use the Brix scale to determine if the sugar level in grapes are ready for harvest.
- Potential Alcohol Scale: This tells you how much alcohol can be made from the sugars currently in your liquid sample. However, a single reading of your potential alcohol scale cannot tell you how much alcohol is already in the wine, only how much alcohol can be made, based on the liquide’s current weight (which tells you how much sugar is left in the sample). On most hydrometers, the Potential Alcohol scale ranges from 0-20% alcohol. For example if you mixed take a reading of 15 percent on the Potential Alcohol scale before the fermentation begins, this means that there is enough sugars in that juice at that point in time to potentially produce 15% worth of alcohol. Not all fermentation uses up every bit of sugar, so when fermentation is complete, you can take a second reading to see how much potential alcohol sugar is left over. By comparing the two readings, you can calculate the current alcohol content level of your wine.
Hydrometer vs. Refractometer
Refractometers can provide similar results as hydrometers, but they require a smaller sample of liquid than your hydrometer does. Measuring Final Gravity with a refractometer also requires a special calculator for your sample.
For the best refractometers for every application, check out this link.
Maintaining your hydrometer
A few things to keep in mind to keep things running smoothly.
- Before using your hydrometer, it’s a good idea to calibrate or even test it with distilled water
- Always handle glass and mercury units with care to avoid accidents
- Always clean your unit before and after use, to ensure accurate readings
- Make sure you safely store and transport your hydrometer between use


